If you are crafty and looking for ways to keep the cost down on your upcoming wedding- why not make your own DIY ACRYLIC WEDDING SIGNS.
It’s actually pretty easy (and cost-effective) to make some of your wedding decorations.
You just need a couple of materials and a Cricut and you can make your own acrylic wedding signs for your big day!
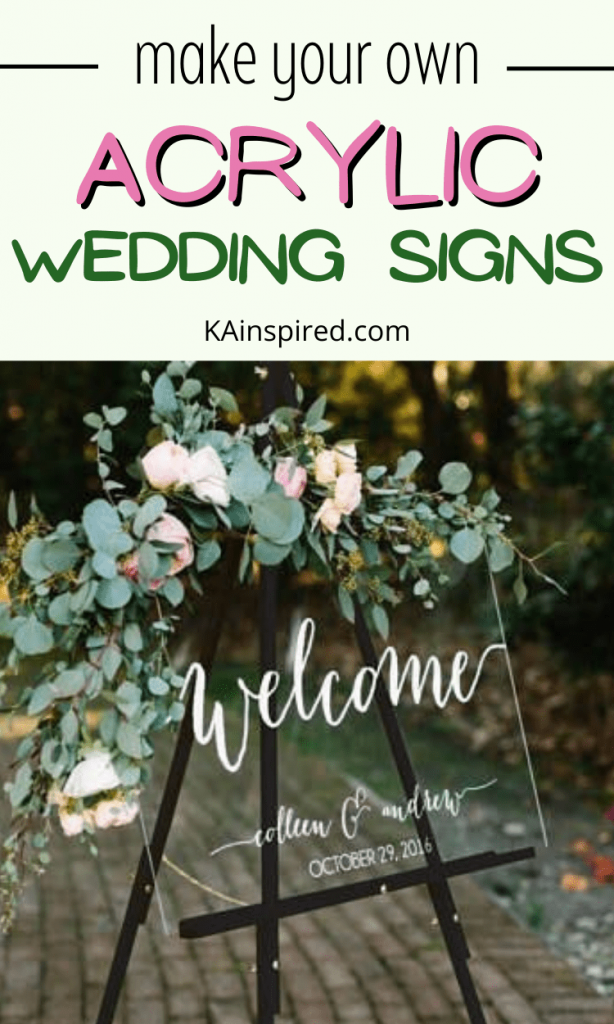
DIY Wedding signs can be an essential part of your wedding day. They are great for welcoming your guests, telling your guests where to go, sharing the menu, table numbers, seating chart, and so many other uses!
You can even use the signs for your bridal shower!
HOW TO MAKE ACRYLIC WEDDING SIGNS
It’s very easy to make your own wedding signs. You just need a few items:
DIY Wedding Sign Materials:
- Cricut
- Cutting Mat
- Weeding Tools
- Scraper
- Removable Vinyl
- Transfer Tape
- Acrylic Sign – 20″ x 32″ Acrylic Sheet
- Stand – Grab an Easel Stand from Hobby Lobby. Every few months they go on sale for 50% off!
- Rubbing Alcohol
- tape measure
STEPS TO MAKE YOUR OWN WEDDING SIGNS
Making your own wedding signs is very easy to do. So there is no need to spend hundreds of dollar on custom wedding signs because you can make DIY wedding decorations at home!
STEP 1: DESIGN YOUR SIGN
First, you’ll want to design your wedding sign in Cricut Design Space. Pick your favorite Cricut Font or upload a font to Cricut Design Space. Once you’ve created your design, don’t forget to size it out so it will fit on your Acrylic sign.
You can make a welcome sign, directions sign, the menu, table numbers, etc. So whatever your sign is for, design it in Cricut Design Space.
STEP 2: CUT YOUR DESIGN
Once you designed your Wedding Sign, you’ll want to use your Cricut to cut it with removable Vinyl on your Cricut Standard Cutting Mat.
By using removable vinyl, you can are able to re-use the Acrylic Sign for another party or celebration.
STEP 3: WEED YOUR DESIGN
Once your wedding sign design is cut, you’ll want to weed the project by removing the excess vinyl.
Once your project is weeded, cut a piece of transfer tape and put it over the vinyl design.
Flip the design over and use your scraper tool to rub the removable vinyl onto the transfer tape.
STEP 4: PLACE YOUR DESIGN DOWN
Once your design is cut. weeded, an on transfer tape, it’s time to make the Acrylic Wedding Sign!
Use your tape measure to measure out exactly where you want to place the vinyl. Then wipe the Acrylic board down with rubbing alcohol and let air dry.
Remove the back of the vinyl, and then place the vinyl design onto your Acrylic Sign. Once down, rub it all over to make sure it sticks and then slowly remove the transfer tape.
TIP: Take some wrapping paper that has a Grid on the plain side. Tape it to the back of the Acrylic sign. This will help you to line up your project and place the vinyl design even and exactly where you want it.
STEP 5: DECORATE YOUR ACRYLIC SIGN
Depending on the sign and your wedding theme, you may want to decorate your Acrycil sign by adding flowers or greenery to the DIY wedding sign.
You can also paint the back of the Acrylic sign to help make the words pop since the acrylic sign is clear. You can use paint color or frost spray.
Get creative and have fun creating a custom DIY wedding sign for your big special day!