LEARN HOW TO TURN HANDWRITING INTO A CUT FILE FOR A MEMORY KEEPSAKE PROJECT
Do you have an old letter, card, or recipe that was written by a loved one that you want to turn into a keepsake item?
Maybe it’s an old recipe card that Grandma wrote or you want to preserve the handwriting from a birthday card. We all have something that we would like to hold on to as a special memory.
So why not convert the handwriting into a cut file so you can create a memorable keepsake gift such as a tea towel, wooden sign, or pillowcase.
Or maybe you want to make a special mother’s day gift or father’s day gift by including the handwriting of a loved one.
Maybe a family member has passed, and you want to make something special to share with other family members so they’ll always have them close.
Whatever the reason may be, it’s very simple to turn handwriting into a cut file.
HOW TO TURN HANDWRITING INTO A CUT FILE
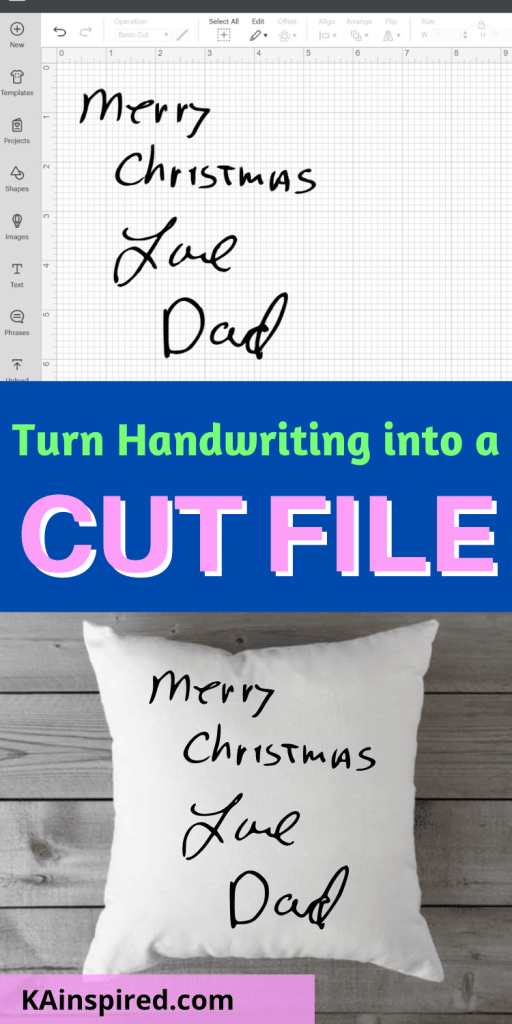
For this project, I will show you how to import handwriting into a Cut File. You can cut the handwriting with vinyl to create an everlasting memorial project, such as a personalized pillow.
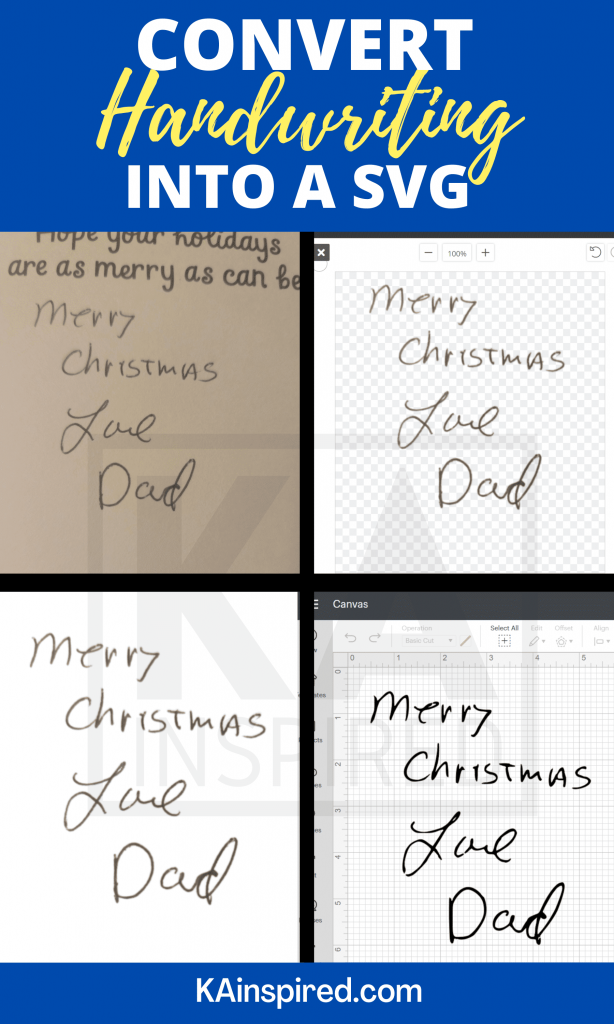
STEP ONE: TAKE A PICTURE
First, you’ll want to take a high-quality photo of the handwriting.
Make sure the picture is taken in a well-lit area and focus on just the handwriting. Crop everything else out of the photo.
STEP 2: REMOVE THE BACKGROUND
Next, you will want to remove the background of the photo and any other unnecessary items or markings in the photo. You can use photoshop or remove.bg to remove the background.
In the end, you only want an image of the handwriting.
STEP 3: UPLOAD TO CRICUT DESIGN SPACE
Once the background has been removed, you’ll want to upload the image to Cricut Design Space.
You can upload the image by going to Cricut Design Space and clicking on “upload image”. Then Select image type “Complex”.
On the next screen, you’ll want to click areas that you want to remove like the background. Don’t forget to click on each letter like “o” and “d”. You want the entire background to be a check box.
Click apply and next. Select cut image and then”upload”. Then you can insert the image onto the canvas.
Learn more about uploading images to Cricut design space here.
STEP 4: SIZE THE IMAGE
Once the image has been uploaded to Cricut Design Space, you’ll want to size it to fit your project.
You could be making a personalized wine glass, tumbler, kitchen towel, pillow, etc.
So figure out how big you want the handwriting to be on your projects, and then set those measurements in Cricut Design Space for the image.
STEP 6: CUT THE IMAGE
Once the image is sized, it’s time to cut it with your Cricut Machine!
So add vinyl to your Cricut Mat and cut the handwriting image with your Cricut
STEP 7: APPLY THE DESIGN
Once your design is cut, you’ll want to weed out the excess material.
Place some transfer tape over the design and then rub the back with a Cricut Scraper. Remove the vinyl backing and apply the design to your project.
HOW TO TURN HANDWRITING INTO A CUT FILE
After 7 simple steps, you can easily convert a personal handwritten item into a design that can be applied to just about anything!
You can convert your favorite family handwritten recipe onto a dishtowel or sign to display in your kitchen.
You can convert a simple flower drawing your child drew and apply it to a flower pot.
If a loved one has passed away, find an old card and convert their writing or message into a memorial keepsake such as a pillow!
There are so many different things you can do once you learn how to turn handwriting into an SVG file.
You can then use that to create a variety of items. And best of all, they make the best personalized Christmas Gifts, personalized Mother’s day gifts, and personalized Father’s day Gifts.
Leave a Reply