Learn how to clean up images in Cricut Design Space so they’ll cut with crisp, clean lines every single time. No more jagged Cricut.
[Updated August 2023]
If you have tried to upload an image to Cricut Design Space, you may have noticed that sometimes the images are not clean.
The lines are jagged and splotchy. Or sometimes there is something on the image that you don’t want.
There have been so many times when I uploaded the picture, it turned out messy.
The lines were not crisp and clean so I knew the project would not cut right.
So I used to scratch the project and find another image or another project.
I know I am not alone with this, as I see many people online asking for Cricut help with cleaning up images with jagged edges that can be used with their Cricut.
Now I have found an EASY WAY to clean those MESSY, jagged lines!
JAGGED LINES ON AN IMAGE UPLOADED TO CRICUT DESIGN SPACE
Sometimes when I upload an image to design space, all I have to do is select the image type, erase the background, and the image looks nice and crisp.
It cuts fine and there are no issues.
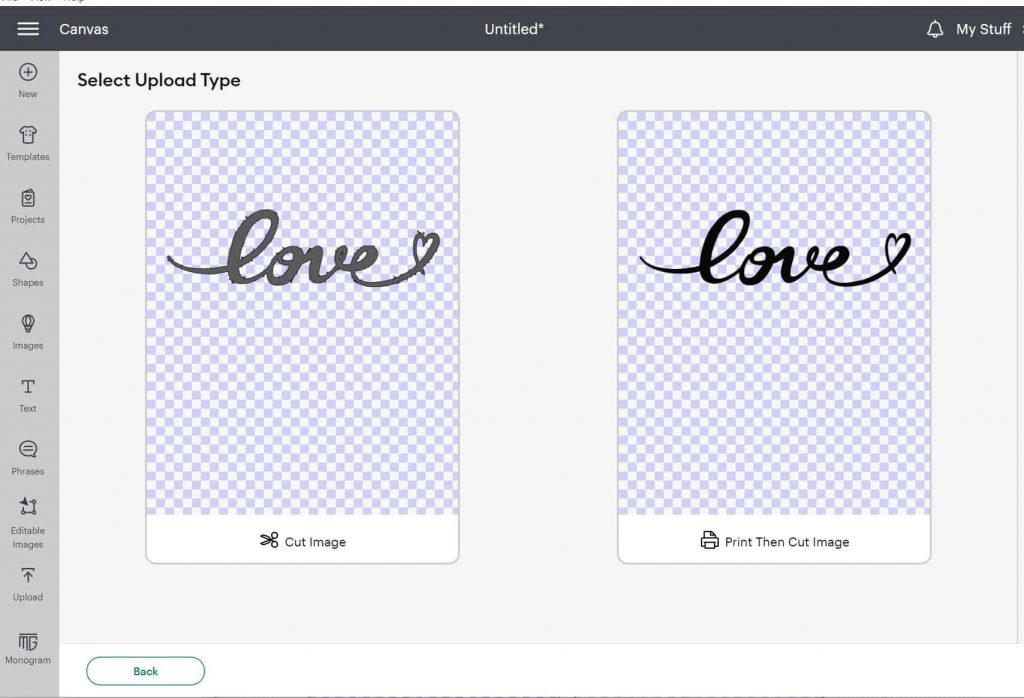
Other times, I get jagged lines on an image uploaded to Cricut Design Space like the image below.
The cut image is on the left and the lines are all jagged. This would never cut right with Cricut.
It can be so frustrating to upload a picture and have it turn out blurry and not clean lines.
This can be more frustrating tp happen to SVG you purchase because you don’t want to spend time creating your own files.
So I found a quick and easy way to clean up images uploaded to Cricut Design Space so your designs can be cut with crisp, clean lines every single time.
CLEAN UP IMAGES IN CRICUT DESIGN SPACE
Here is a quick and easy way to clean up images that are splotchy when uploading to Cricut Design Space.
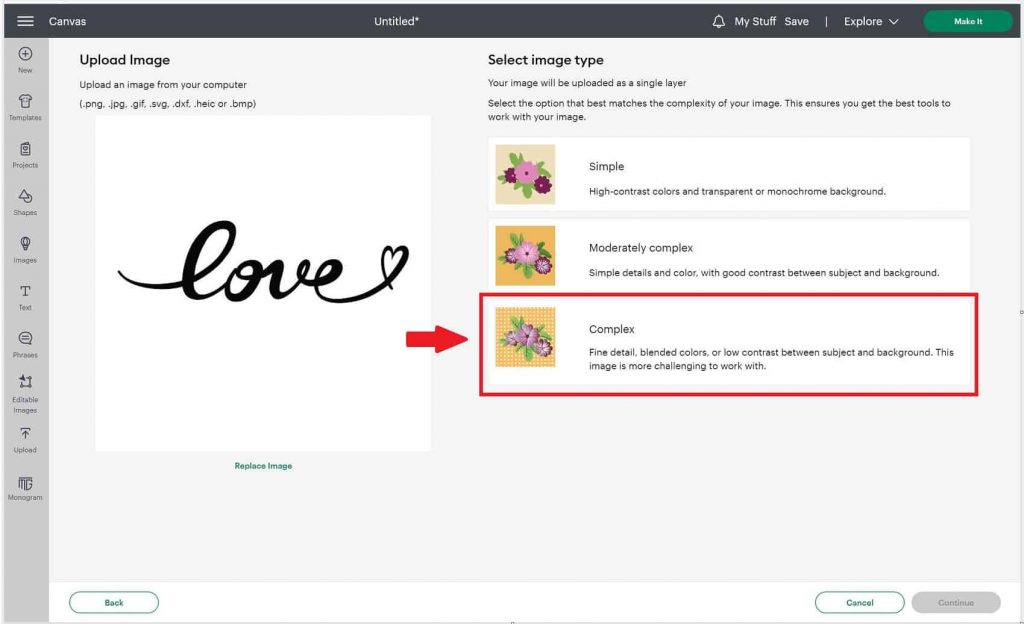
- Upload your Image to Cricut Design Space and Select the image type as Complex. Then click Continue.
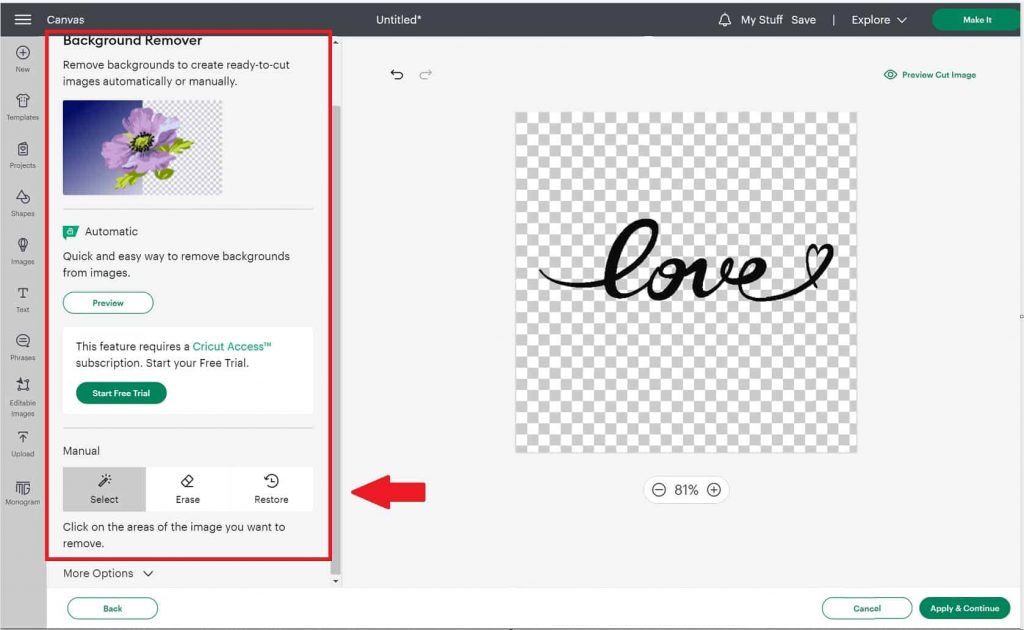
2. Before you start cleaning up the image, click on “More Options“. Change the Reduce Colors to 2 and Color Tolerance to 150. Click enter.
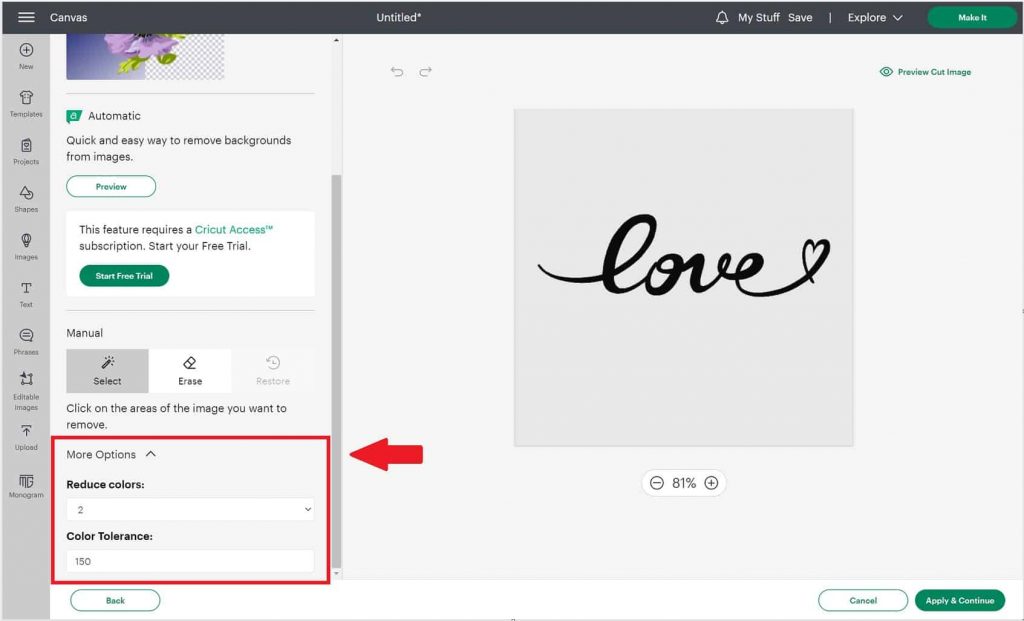
3. Now you will clean up the background. Select the wand under “Background Remover” to remove or erase the background.
You can use the eraser to remove anything else that you don’t want in the cut.
Then click Apply & Continue
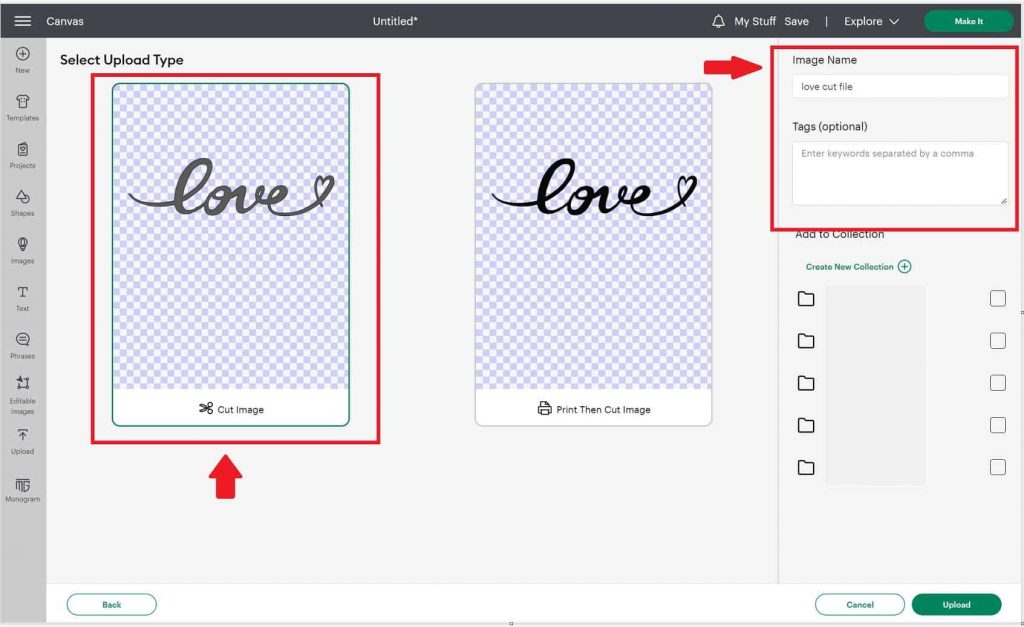
4. Next, click on the cut image and then give the image a name and tag (optional). Then click upload.
The file is added to your recent uploads and then you can add it to your Cricut Canvas.
UPLOAD IMAGES TO CRICUT DESIGN SPACE
If you follow this quick and easy guide on how to easily clean the lines on your Cricut files, you’ll no longer have to worry about cutting designs with jagged edges.
Now every image you upload any file to Cricut, you can make sure it has crisp, clean lines so you can have perfect Cricut cuts.
This works great. I have struggled with this issue for a long time. Thanks!
What kind of image are you uploading?? When I upload an image I don’t get those options. I use apple products. Phone pad and desktop.
Cricut did an update so you have to click “more options” to see reduce colors and color tolerance.
Thank you! Made my life so much easier.
It still didn’t work, but my computer seems to make everything more complicated than it should. On my laptop things come up more clear so maybe I ll try that
I’ve only tried this method on the laptop. Did it work on the laptop?
Thank you for this tip! I will definitely be trying this!
Hey buddy, tried this tip to clean up my image. It still shows some jagged lines. Further help is much appreciated.
Thanks.
DS
I suggest uploading the image again. After you hit “complex”, on the next screen don’t click anything. The first thing you should do is click “advance options” and then Change the Reduce Colors to 2 and Color Tolerance to 150. Then clean up the image (if needed)
Is there a way to do this on an iPad? I don’t think I have those options or I don’t know where to go to find them. Thanks for any help you can offer.
I’m not sure – I’ve only tried it with a laptop
The option could look at more option click on the arrow that where i find it on the cricut explore 2
This had save my life.
Hi Kelly, I was needing to ask you if you know what to set it on for a pic in color instead of black and white? (If that makes sense lol)
What type of file are you trying this on?
Me TOO! My image is a simple line logo in a terra cotta color with a beige background. This formula erased the entire image
What is the file type you are uploading?
There is no option to clean up when you load an svg. All you can do is upload: this works when uploading a ping etc.
What type of SVG are you uploading? It works for me when I upload SVG’s
Thank you sooooo much for this wonderful tip. I have worked hours on cleaning up images that I just had to have instead of moving on to another design. This is a game changer as far as I am concerned!
Thank you soooo much!! I have been trying to figure this out for hrs:/ video after video. Thanks🤎
This worked great for me! Thank you!!
I have tried it on both laptop and Android phone I don’t have the complex option hp me please so frustrated with this ever since the upgrade. I am almost giving up on this
I just did the latest Cricut Update (on my laptop) and this Cricut Hack stills works. Upload your image, under image type, hit Complex. On the next screen, scroll down to “More Option”. Then you can adjust the reduce colors and color tolerance.
I have a logo that is 3 colors, the original file is PNG but I needed to cut it in layers for an HTV project so I converted it to an SVG and unfortunately the white outer line is super choppy. If I upload to cricut as a PNG, I can follow your steps but end up with just a solid black image. There is no option for complex when I upload an SVG. Any tips on how to handle a multi color project for layering?
Hi Kris, I just tried to upload an SVG file with multiple colors and I can select complex. Then on the next screen, under more options, I can change the reduce colors and color tolerance. It did change it to black. If I needed it to be cut in different colors, I could put the multiple colors on my mat in the right spot. Or use can use the slice tool to make the design in separate sections.