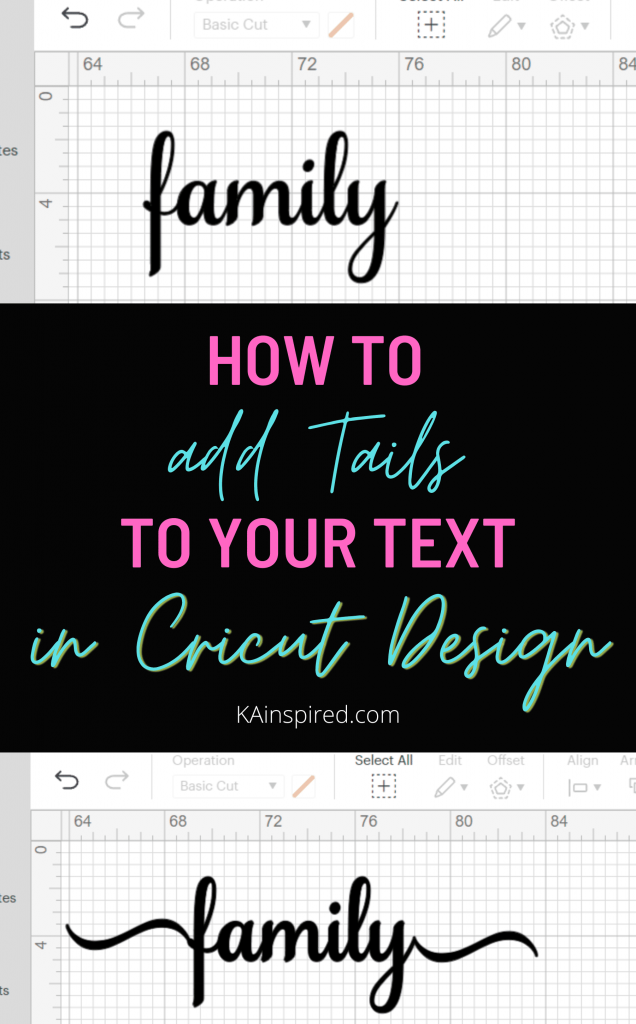
LEARN HOW TO ADD TAILS TO TEXT IN CRICUT DESIGNS SPACE
Have you seen finished Cricut Projects with beautiful fonts that have a tail at the beginning and end of the word?
Have you been wondering how to add the tails to your own projects in Cricut Design Space?
Well – look no further! I’m going to show you how to easily add tails to text in Cricut Design Space!
Creating beautiful words and names with fonts has been one of my favorite things to do with Cricut Design Space. And I bet it will become one of your favorite Cricut Projects too!
And the best part?! Most fonts come already come with extra characters or font Glyphs so you can easily add tails to text.
WHAT ARE FONT GLYPHS
Every font comes with a character map.
In the character map, there are individual characters shown.
Sometimes a character can have a variety of versions, which is known as a glyph. So you’ll see multiple glyph for the same letter and number.
A font could come with 3 different designs of the letter A. You can view the different designs on the character map. This means you would have 3 glyphs.
HOW TO ADD TAILS TO TEXT IN CRICUT DESIGN SPACE
One of my favorite fonts that come with a lot of glyphs is the Samantha font by Laura Worthington. It’s the perfect script font to use to add tails to text in Cricut Design Space.
So I’ll walk you through the steps on how to add tails using the Samantha Font.
These steps can be used with any font, but keep in mind, that not all fonts come with extra glyphs.
If you want to know if a font comes with any extra characters or glyphs, just look at the character map to see.
Or you can check on my list of FREE CRICUT FONTS WITH TAILS AND EXTRA GLYPH.
STEPS TO USE FONT GLYPHS WITH CRICUT DESIGN SPACE
- Open up Cricut Design Space and go to a new project.
- Click Text and type out the word you want to add tails to
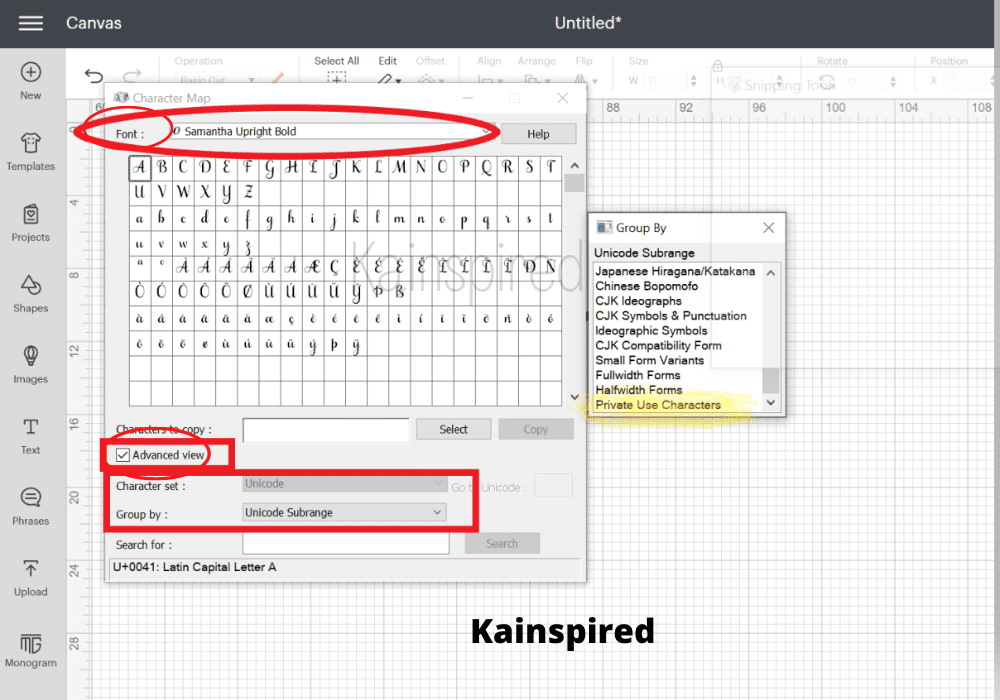
- Change the Font to Samantha Upright Bold (or your font of choice)

- On your computer open up the character map. (If using windows, go to the start bar and search for the character map app. Click to open)
- In the Character Map, change the font to Samatha Upright Bold
- Click “advanced View” and make sure the Character set is to Unicode. Under Group by, select “Unicode subrange”. Another box will open and scroll down to “Private Use Characters”
- Please note: Not all fonts have a private use section so you don’t always need to click into the advance view section
- Now scroll through the Character map to see all the different characters and font glyphs for the font. If you click on one of them, the box will get a little bigger to make it a little easier to view.
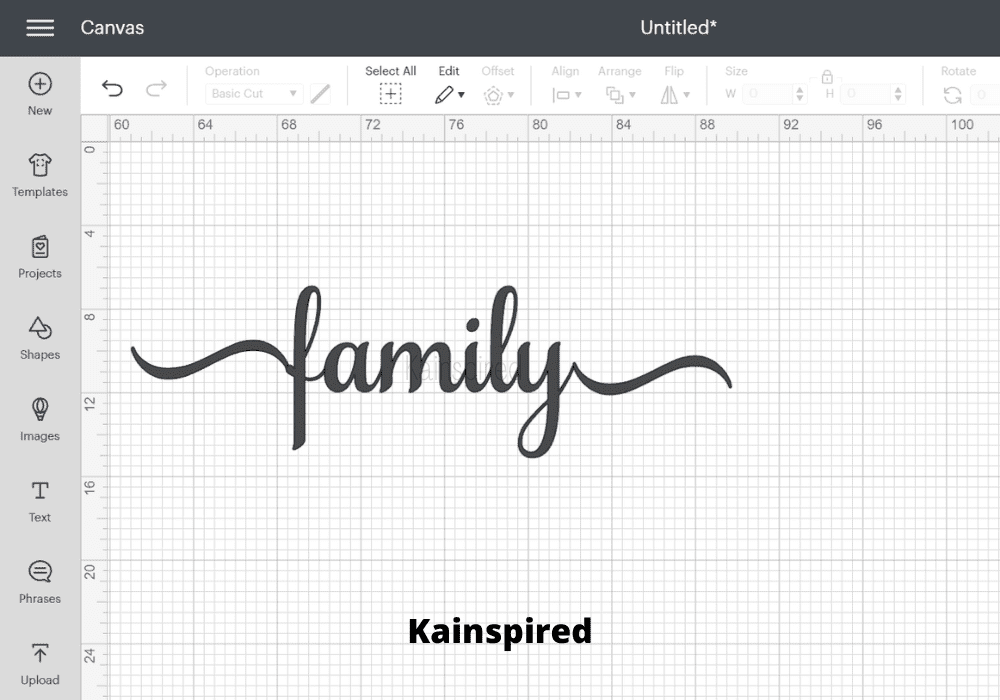
- Once you have found the character or font glyph you want to use, click on on it. Then click select and copy.
- Now go to Cricut Design Space and click on the text. Paste the character or font glyph into where you want it to be in your text
TIP: If the tail doesn’t touch the text or does not line up right, you can ungroup the character and then manually move it to where you want.
HOW tO ADD TAILS TO TEXT
Now that you know how to access the character map and how to find hidden font glyphs, let me show you how to use add tails to text.
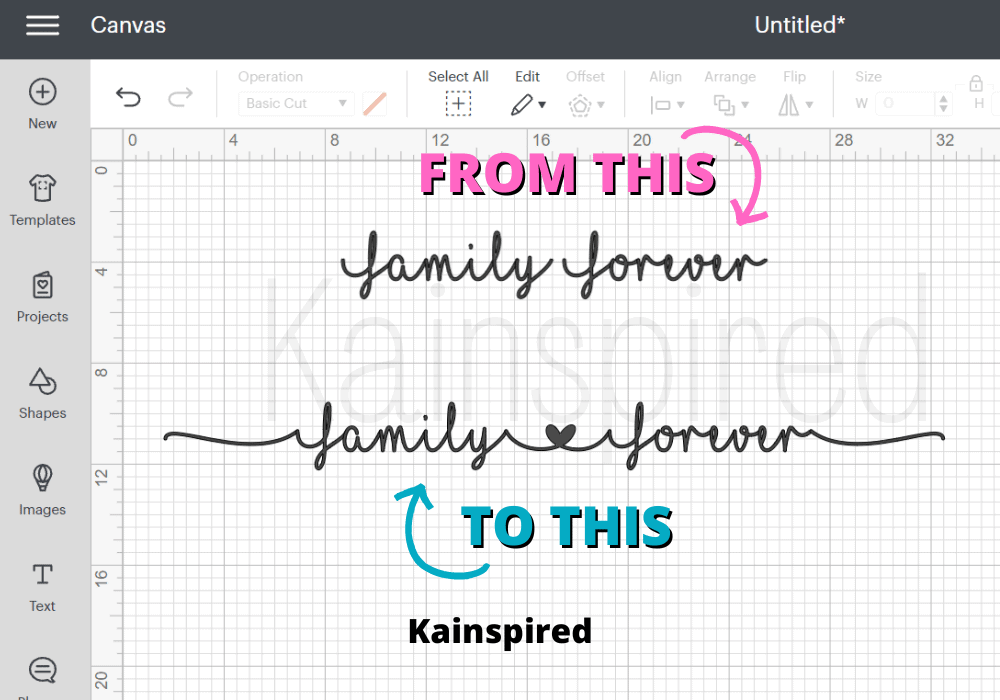
In this example, I am going to use the I LOVE GLITTER font to create a family forever phrase.
Instead of just using the words family forever, I added tails to the beginning and end of the phrase. I also add a heart with tails to connect the two words.
You can open up the character map and change the font to “I Love Glitter”.
You can then view all the different font glyphs that come with this font. Find the glyphs you want to use and click on it. Then click select and copy.
Go to Cricut Design Space and past the glyph into the text.
TIP: If the tail doesn’t touch the text or does not line up right, you can ungroup the character and then manually move it to where you want.
There are also shortcuts that can be used with the I Love Glitter font so you don’t have to open up the character map.
When in Cricut Design Space, you can type the following in your text phrase:
- Type “[” or “]” (brackets) for the tails at the beginning and end
- Type “|” (vertical bar) for the solid heart with tails
- Type “_” (underscore) for the open heart with tails.
- Type “*” (asterisk) to create a heart
FONT GLYPHS TO DRESS UP YOUR FONT
You can also dress up your font with different font characters, without adding tails to text.
You can swap out the standard letters for fancier letters to create a fancier text phrase.
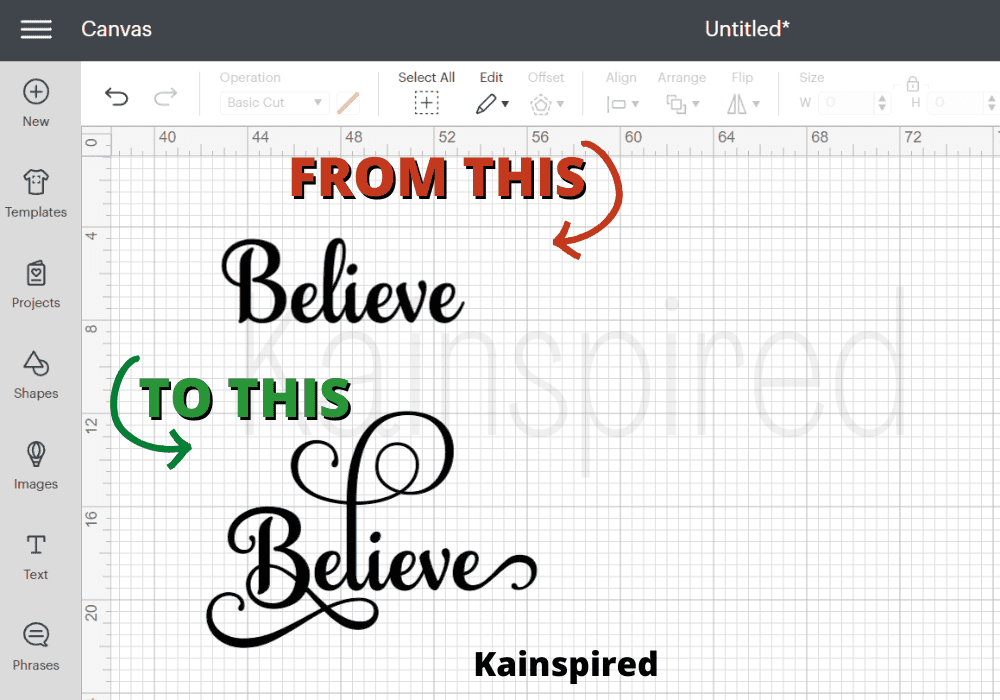
Just look at the difference between the word “Believe” in the image above..
I swapped out the first letter, a middle letter, and the end letter to can create an elegant phrase.
I used the Samantha Font to dress up the text Believe. I swapped out the B, l, and e.
Now I’m going to cut this design out with my Cricut and apply it to Glitter Christmas Ornaments.
Leave a Reply